Showing posts with label kitbash. Show all posts

Saturday, May 23, 2020

Conrail RS-3m

Penn Central started the program of re-powering Alco RS-3s using EMD engine from surplus E-8's.  Conrail continued the program, and these engines out lasted all other Alcos on Conrail.  Back in the late 1980's a gentleman from western NY made a beautiful plastic kit for the distinctive hump that these locos had. I used an Atlas RS-3 as the base of the build


Here is and Atlas shell, I have removed the large radiator fan and the exhaust stack.

Another view.


I have oped up the engine room and this show the various parts i used.

A close up of the cuts.

The extended engine compartment has been added and the fan has started to be filled.

Another view.

The fans have been added as well as the cab.


This shows the center widow that have been sealed.

Another view

The top is a finished NH unit, the center will become and Amtrak unit and the bottom the Conrail unit.


Here is the finished model, I used a mic of Microscale and Accucal decals.  I weathered with Pan Pastels


Sunday, June 24, 2018

New Haven Railroad County Parlor cars

When the New Haven Railroad purchased it's new stainless steel cars after WWII, part of the order were for a 20 combination Parlor-Baggage cars.  They were delivered in two basic layouts, but these were later modified on some of the cars.  I am not sure if Rapido will make these cars and I really wanted a pair of them for the East Wind trains.  I decided to combine (pun intended) a Rapido car and a set of E&B Valley Car Works sides to create these cars.  I have some photos to show how I went about it.


Here are the incorrectly painted Penn Central coaches that I used to create my Parlor.
A better starting point would to use an unnamed Parlor from Rapido

I removed the sides, but saved the vestibule doors on the end of the car with the
 most vents.  This keeps the doors consistent with other Rapido cars.

The first side removed.

The E&B Valley Car with the skirting and vestibule door removed.
I used Model Flex Red/Orange for the strip and Tamiya Mica Silver
is a close match to the Rapid silver paint.

Here is the unmodified interior from a Rapido Parlor car. You need to remove most of
the seat and then remove the the blue floor and turn it 180 degrees.  The steps must
also be removed from one end and installed in the other.


This show you the major components prior to assembly.  I had to move
some of the vents around to match the prototype.  I did use some
vents from Custom Finishing.  The name boards on the side of the car
are made from .005 styrene. 

you need a door for the baggage end of the car, I used a door from the bulkhead of the
old E&B valley car.  I sealed the window with a piece of styrene.  The door
was then glued to the Rapido vestibule.


Here is a diagram of the cars as delivered.


Friday, April 6, 2018

PS-1 Box Cars

The New Haven bought 1000 PS-1 40 box cars that had 10'6" interior height.  They are considered to be earlier body style with on ribs on the end panels of the roof, now small rectangle panels on the peak of the ends and shorter tabs on the sides by the bolsters.  Ted Culotta did a great article on these care as part of his Essential freight Car series that ran in Railroad Model Craftsman. He also has great decals for script herald for these cars, just check out Speedwitch models.


The 7' Superior doors are from Southwest Scale.


Sunday, April 30, 2017

Conrail N8A Finishing up

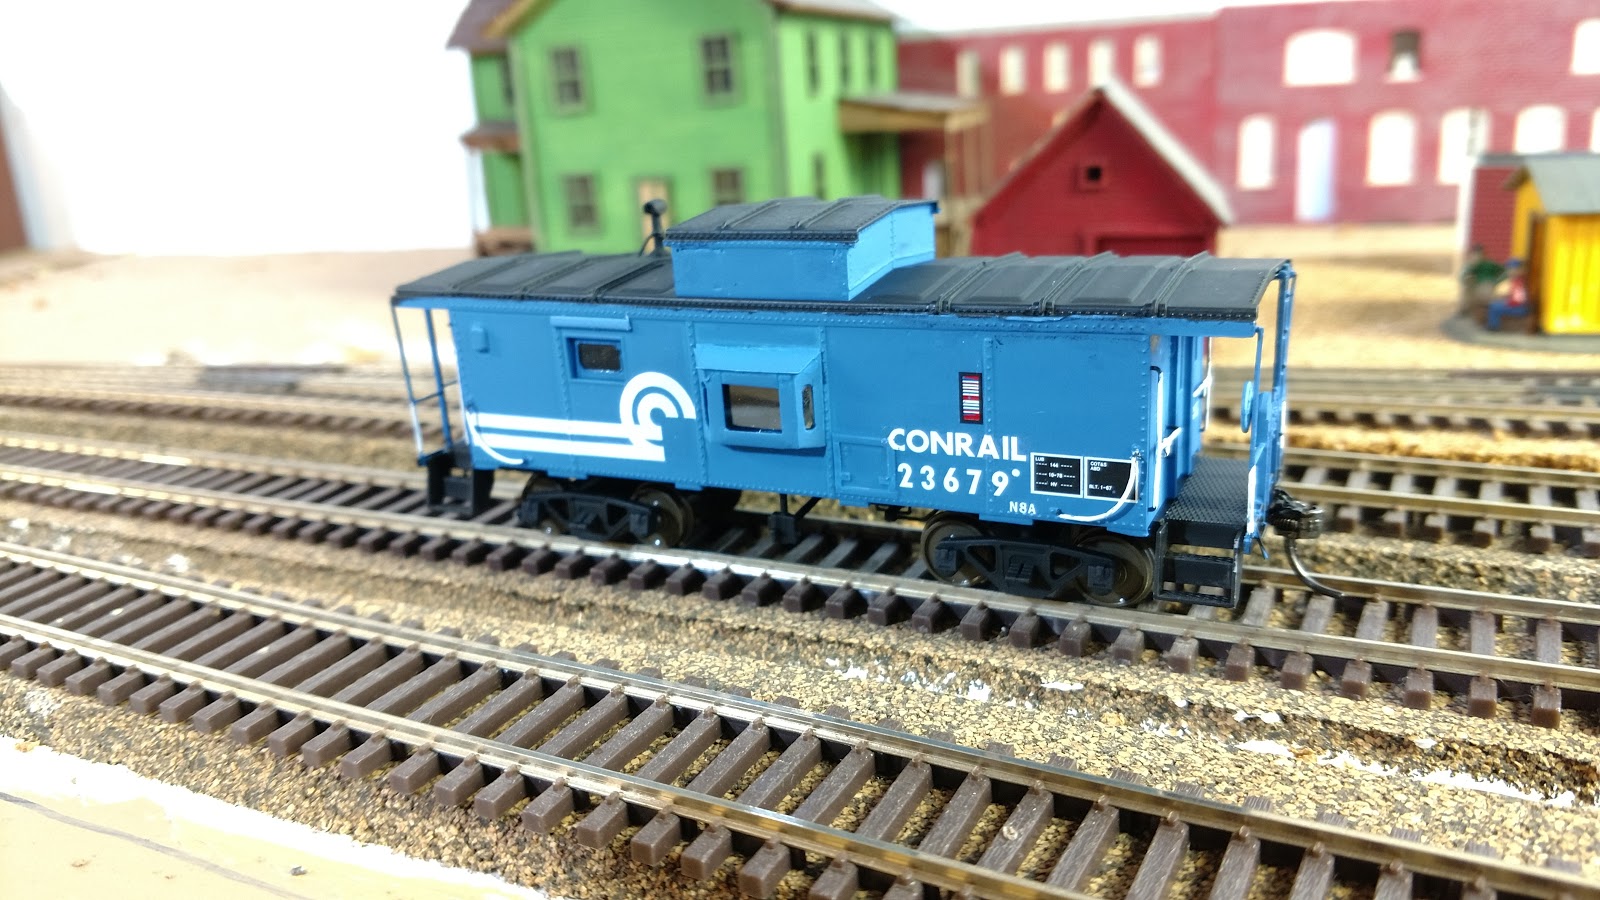
I have decaled and added the various grab irons and railings to the N8A.  I did cut off all of the rungs on the ladder except the one that is near the top railing.  I used Model Flex Paint from Badger to paint the model.  I have found I can order individual two ounce bottles from them via Amazon for $6.95 each, with not shipping costs. Mt Vernon car shops makes a nice decal set for Conrail Cabooses and should have everything you need to do it correctly.  I decided to cobble together all of the lettering from carious sets I had on hand.  I used an Old Accu-Cal Multi set, Microscale Conrail diesel set, Microscale Penn Central caboose set and Penn Central Historical Society caboose set. 

Here is the Conrail N8A next to an as delivered New Haven NE-6 in it
delivery paint scheme.

You can see the new smaller windows, I simply masked the supplied
window material to create new smaller window.  The added side vents
around the window are also visible.


Sunday, April 9, 2017

B&M Rebuilt Caboose

In the 1950's the B&M sent a number of steel under frame, wood body cabooses to International Car to be rebuilt into more modern all steel cabooses.  A number were built with cupolas, c-51 to c-134 while some had none and were used as transfer cabooses.  This is another kitbash that has been sitting on my self for a long time.  The car body is an Atlas caboose and the cupola is a kit from Moloco. You basically cut out the the section on the body that original cupola was over. (where there is no roof.)  I had the wrong cupola kit from Moloco and there web site says they are sold out, so I simply cut the solid pieces of the side walls, used the kit widows in the corners and used some sheet styrene to fill in the gap in the center, you can see the changes in the photos.  One small window on one side needs to be blanked out and a filler strip of styrene to create the straight side sill.  You also need to cut down the under frame and the weight to it the length of the body.

The three Main components.

This shows the modified body with the blanked window, cupola with
changes and the filer on the sill. 

Here is the section I removed from the body.

Here is the other side, it keeps its window.

Saturday, April 8, 2017

Conrail N8a Caboose, Part 2

I have done some more work and rework on my Conrail N8a.  I was not happy with how the bay windows looked and rebuilt them.  A not on how I work on building models.  On this project I am not aware of any drawings of the rebuilt cabooses.  I simply estimated the size and position of the bay windows and used sizes of commercially available strip styrene.  I use a set of calipers to measure distance between things and transfer that to the styrene.  I don not actually use a ruler to measure the item.

I added two strip of .040 x .100 styrene wit the ends cut a a 45 degree angle.
Note the access hatch to the lower right of the bay window, I made this by simply
gluing some narrow strips to the car body.  The latches are made the same way. 


I have added a window frame made from .010 x .100 styrene.
Here is how I made the end sections on the bay windows.  I cut the top pf them
at a 30 degree angle and then drilled two holes for the top and bottom of the
window.  I then cutout the material in the middle to create the window opening.

I have added the top of the bay window this is from a .010 x .125 strip of
styrene, the ends at a 45 degree angle.
 .
Here is the the other side.
I am know waiting for some Detail Associates rectangular vents to finish up the model.  It is a fairly easy kitbash and make a very distinctive model.